|
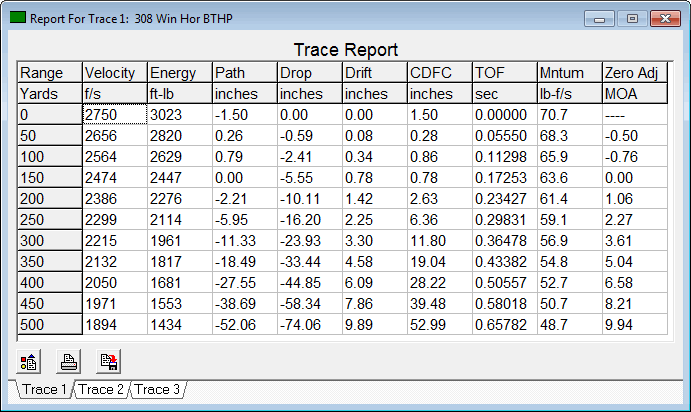
Report Traces Click View on the main menu and then click Report Traces to open this display. The selected trace's parameters and up to nine categories of trace data are shown in a grid. Use the grid's scroll barsScroll_Bar to scroll up and down, left and right.
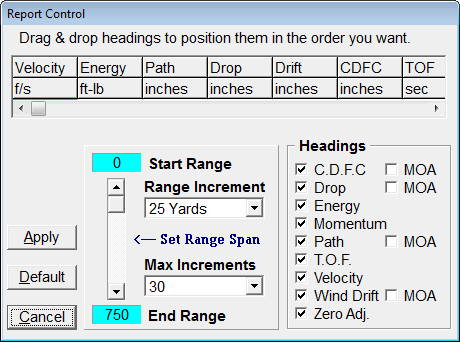
Report Control Click the Controls button to open the Report Control window.
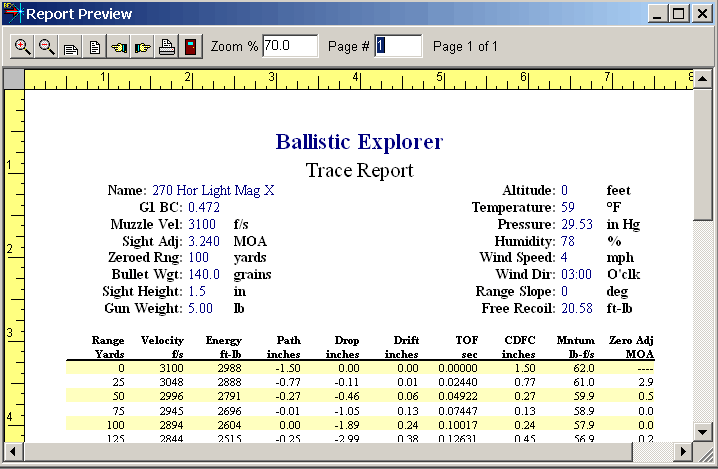
At the top of the window is a grid showing the headings for the report. A group of check boxes allows you to select which headings you want to display. When a heading is clicked off, it's removed from the grid. When a heading is clicked on, it's added to the right side of the grid. You may have to scroll the grid to see all the headings. You can change the order of headings by dragging them to a new position and dropping them. To drag and drop headings, move the mouse cursor over the heading you want to move and then press down and hold down the left mouse button. While holding the button down, drag the cursor to the location on the grid where you want the heading to be, and then drop it by releasing the button. When you drop a heading, other headings move left or right to make room for it. The program saves your heading arrangement to disk, so you don't have to arrange headings every time you want to print a report. If you make some changes that you don't like, click the Cancel button to exit the Report Control window without applying the changes. You can also click the Default button to restore the headings to their default locations. Click the Range Increment combo box to set the distance between readings. If there's more ranges than set by the Max Ingrements combo box the Set Range scroll bar allows you to set the beginning and ending ranges of the Report. If Max Increments is set to more than about 50, the additional ranges are printed on subsequent pages. Click the File button to save the selected trace's data to a standard ASCII file. Most word processing packages can work with ASCII files; thus, you can use your word processor to put trace data into any format you want. A standard file dialog box allows you to specify the name and directory for this file. Once you have selected the trace and range increment and headings you want, click the Print button. If you have the Print preview option selected, the Report is displayed in the Print Preview window and you can either print it or cancel printing by exiting the preview window.
|
||