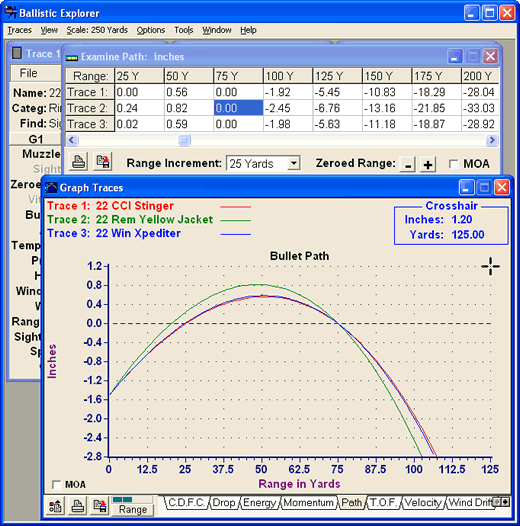
The Zeroed Range buttons let you quickly view the effects of different zeroed ranges on the bullet paths. Next we'll load and compare a different load against the loads in Trace 1 and Trace 3...